
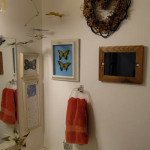
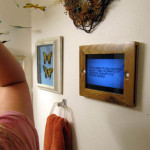
I made this frame after I saw Anna watch hair tutorials on her IPad. I noticed that she had some difficulty switching between her IPad and the mirror. She had no adequate place to put the IPad and still see the video. I thought an IPad frame would be perfect to hold it on the wall, hands-free.
My only dilemma was that IPad frames are usually single function. I really didn’t want to have an empty frame hanging on the wall when she wasn’t using it for the IPad. My simple solution..add a mirror behind the IPad. With a mirror in the frame it would be useful both with and without the IPad inside.
I love designing projects, especially those that involve wood. Besides, if it can solve a “problem” I’m all about spending some time on it.
You can quickly browse the pictures I took while I built the IPad Frame, or skip down to read the explanations:
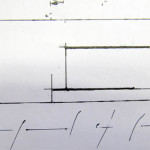

The initial profile sketch

I know this sketch is not the greatest but it does give the idea of the placement of the IPad and the Mirror. The darker lines represent the placement of the felt.
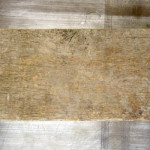
The reclaimed block of wood

This nice little block of quarter-sawn oak was reclaimed from a pile of junk that was to be thrown away. I love old quarter-sawn oak, and even scraps like this can be useful.
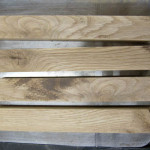
Frame sides rough cut

I planed down one side of the block and used its flat surface to plane the front which gave me a good 90 degree angle to start the cuts. My original sketch planned for the profile width to be 1 ½” wide, however I decided to make it smaller. The depth of the profile sketch was around ¾”, however once I found the block of wood, I decided to use as much of the depth to my advantage. I was able to cut these pieces with little waste.
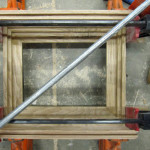
Frame profile cut and mitered

I used a simple ½” router bit to cut the IPad and mirror slots. It took a bit of trial and error to get the depth just right. I like to start by cutting the material much less than I first anticipate, and then take a bit more off after measuring and fitting. I cut the miter joints once the depths were perfect.
Frame sides clamped together

I have yet to invest in a decent picture-frame clamp, so this was not an overly friendly clamping job. Everything came out square, so I was happy with the result.
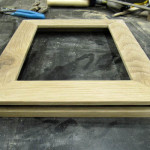
Puttied corners and sanded frame

The front corners of the frame did not glue as well as I had hoped, so I had to putty them quite a bit. Next time I will clamp the frame better to end up with more solid joints. Beyond the wide joints, the frame is shaping up.
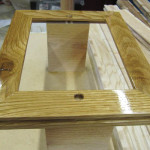
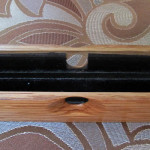
IPad entry slot

This slot took a good deal of lining up to get right. I cut it to match up with the level that the IPad is to be held. I cut the slot to be slightly larger than the thickness of the IPad to account for the thickness of the felt that would cover the wood and mirror.
Camera and Home Button holes

These are the holes I initially cut for the camera and home button. I completely changed the holes after some testing with the IPad.
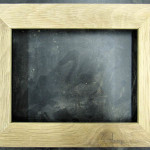
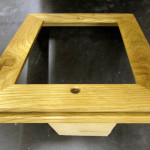
Frame stained natural

The natural stain I used on the frame nicely accented the oak grain. The sides of the frame show gorgeous quarter-sawn grain. I have come to appreciate the beauty of natural stains on wood. Once this is lacquered the grain will be stunning.
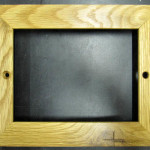
Lacquered frame

Valspar lacquer always does a great job. I will never go back to anything else.
Hanging hardware & mirror

I apologize for the few missing steps with this project. I did some testing with the IPad after the previous step and decided that the camera and button holes were inadequate. I had to rethink the holes. Once I got them right I stained and lacquered the frame again.
I cut this mirror from an old dresser mirror that had been in storage for ages. It was an old nearly ¼” thick mirror. Luckily I was able to snap the glass without messing it up. I ran a line of silicone on the inside face of the mirror and then did the same on the back corners once I dropped the mirror inside. I predrilled at about a 45o angle for the eye screws. I had to bend the eye screws over after everything was secure to flatten them a bit. I picked up the wire and eye screws from Lowe’s. Both were the smallest I could buy.
Felt lining

I lined the slot and everywhere that would touch the front or back of the IPad with felt.
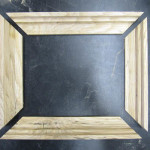
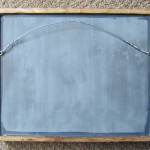
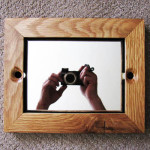
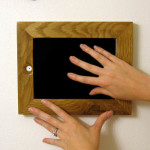
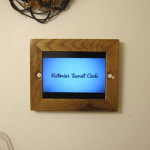
Mirror shot

Notice the button and camera holes are a bit different from before. This is the frame completely finished.
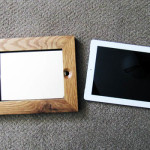
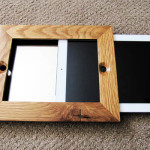
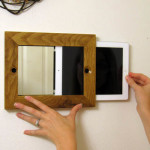
IPad frame & IPad side by side

The IPad frame/mirror and IPad side by side.
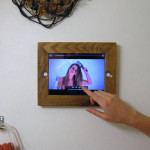
IPad inside the frame

It fits perfectly.
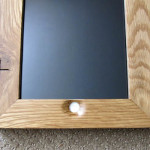
Home button access

The home button is easy to use.
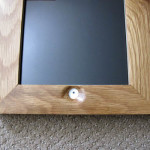
Camera access

The camera and light sensor are exposed.
Felt lining

I forgot to take pictures of the felt before I placed the mirror, so here it is. Remember that half of the image is a reflection.
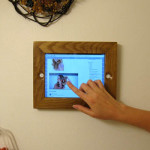
Inserting the IPad
I chose to use a wire to hang the frame because wire is much more secure for a frame that will be moved around. The IPad is very easy to slip into the frame through its slot.
Finished !


